How to Winterize a Sprinkler System: A Step-by-Step Guide for Kansas City Homeowners
 If you have a sprinkler system in Kansas City, winterizing it before freezing temperatures arrive is one fall maintenance task you don’t want to skip.
Even after you shut your sprinklers off for the season, water can remain inside irrigation lines, valves and other components. When that water freezes, it expands—and that can mean cracked pipes, damaged valves and an expensive surprise when you turn everything back on in the spring.
The good news? Proper sprinkler winterization can help prevent it.
Whether you’re planning to winterize your sprinkler system yourself or you’re trying to decide if you’d rather call a professional, here’s what you need to know.
When Should You Winterize Your Sprinkler System in Kansas City?
For most Kansas City homeowners, fall is the time to winterize your sprinkler system.
You don’t necessarily want to shut everything down too early if your lawn and landscaping still need water. But Kansas City weather can change quickly, so you also don’t want to wait until a hard freeze is suddenly in the forecast.
That’s also when everyone else remembers they need to winterize—and appointments start filling up.
The goal is simple: get your system winterized before sustained freezing temperatures arrive.
What Do You Need to Winterize a Sprinkler System?
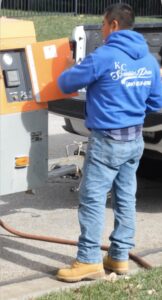 If your irrigation system is designed to be winterized using the blowout method, you’ll generally need:
- An air compressor capable of supplying adequate air volume (CFM)
- The correct hose and fittings for your system
- Access to your irrigation water shutoff
- Access to the proper blowout connection
- Access to your sprinkler controller
- Eye protection
- A basic understanding of your irrigation system and zone layout
Before you begin, make sure you know what you’re working with. Irrigation systems aren’t all designed exactly the same way, and things like pipe material, backflow assemblies and connection points can change how a system should be winterized.
How to Winterize a Sprinkler System Step by Step
Step 1: Shut Off the Water to Your Irrigation System
Start by locating the shutoff valve that supplies water specifically to your sprinkler system and turn it off.
Be careful not to confuse this with the main water shutoff for your entire home.
Once the irrigation water is off, you can begin clearing the water that’s still sitting inside the system.
Step 2: Find the Correct Blowout Connection
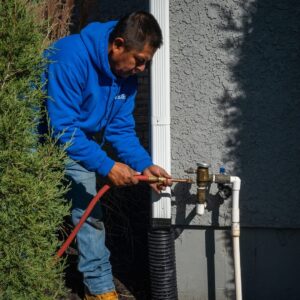 Next, locate the connection point where compressed air can safely be introduced into your irrigation system.
This connection should be downstream of the backflow preventer. You should never blow compressed air through the backflow device itself.
If you aren’t sure where your blowout connection is—or you’re looking at the plumbing and guessing—this is a good place to stop and call an irrigation professional.
Step 3: Use the Right Air Compressor
This is where sprinkler winterization gets a little more technical.
A successful sprinkler blowout requires enough air volume (CFM) to move water through the lines without using excessive air pressure (PSI) that could damage your irrigation system.
In other words:
More PSI does NOT mean a better blowout.
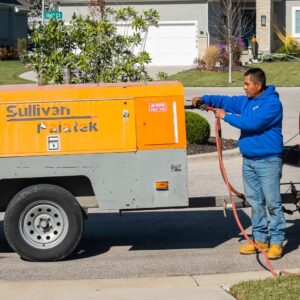 The appropriate compressor and pressure depend on your system, including the pipe material, pipe size, zone size and irrigation components.
As a general guideline:
- For PVC irrigation systems, pressure should not exceed 80 PSI.
- For polyethylene irrigation systems, pressure should not exceed 50 PSI.
- You should always stay below the maximum operating pressure of the lowest-rated component in the zone.
Air volume matters just as much.
A small household compressor may be able to reach a high PSI but still not provide enough sustained CFM to effectively push water through an entire irrigation zone.
Don’t try to make up for a compressor that’s too small by building up extremely high pressure and releasing it into the system. That can damage irrigation components and create a safety hazard.
Not sure what your particular system requires? Check the manufacturer’s specifications before introducing compressed air.
Step 4: Open a Zone and Slowly Introduce Air
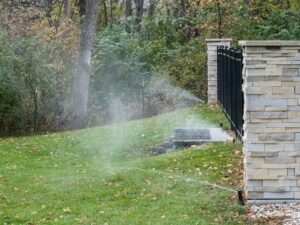 Before introducing compressed air into the system, make sure at least one irrigation zone is open.
Connect your compressor to the appropriate blowout connection with the compressor valve closed. Then slowly introduce air into the system.
You should begin seeing water discharge from the sprinkler heads in the open zone.
And a quick safety reminder: never stand directly over sprinkler heads, valves or other irrigation components while the system is pressurized. Wear eye protection and keep other people and pets away from the active zone.
Step 5: Blow Out Each Zone
 Now you’ll work through your sprinkler system one zone at a time.
A good place to begin is with the zone farthest from the compressor.
As compressed air moves through the line, the sprinkler heads will rise and begin pushing out the remaining water.
Once the water has cleared and you’re seeing mostly air or a fine mist, move on rather than continuing to force air through a dry zone.
It’s generally better to make two or three shorter passes through each zone than one long pass. Continuously forcing compressed air through dry irrigation components can create heat and potentially cause damage.
Continue until you’ve cleared every zone in your system.
And don’t forget about landscape beds, drip irrigation or other specialty zones that may be part of your setup.
Step 6: Winterize the Backflow Preventer
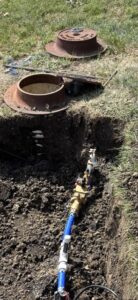
Your backflow preventer also needs to be protected from freezing temperatures.
Remember: you should not blow compressed air through the backflow preventer.
Once you’ve finished clearing the irrigation lines and disconnected the compressor, the backflow assembly should be drained and left in the correct position for winter.
Because there are several types of backflow preventers, the exact process can vary. Follow the manufacturer’s instructions for your particular assembly.
If you don’t know what type of backflow preventer you have or how it should be left for winter, don’t guess. A professional can identify the assembly and make sure it’s properly protected.
Step 7: Set Your Sprinkler Controller for Winter
 The final step is making sure your controller isn’t still trying to run your normal watering schedule.
Depending on your controller, that may mean switching it to OFF, standby or rain/off mode rather than completely disconnecting the power.
If you have a smart irrigation controller, such as a Hunter Hydrawise system, check the manufacturer’s recommendations for your specific model.
Once that’s done, your sprinkler system is ready for winter.
Common Sprinkler Winterization Mistakes to Avoid
If you’re tackling sprinkler winterization yourself, most problems come down to a handful of mistakes:
- Using too much air pressure
- Using a compressor that doesn’t provide enough CFM
- Trying to compensate for low CFM by increasing PSI
- Blowing compressed air through the backflow preventer
- Introducing air without an irrigation zone open
- Forgetting landscape, drip or specialty zones
- Continuing to blow air through a zone after it’s dry
- Forgetting to properly winterize the backflow assembly
The goal isn’t to blast as much air as possible through the system. It’s to safely remove the water that could cause damage when temperatures drop.
Can You Winterize a Sprinkler System Yourself?
 Absolutely.
If you know your irrigation system, understand where your shutoff and blowout connections are, and have access to the right equipment, sprinkler winterization can be a DIY project.
But if you made it halfway through this guide and realized you don’t know what type of backflow preventer you have—or you don’t have an air compressor capable of doing the job properly—that’s okay, too.
That’s what we’re here for.
How Much Does Sprinkler Winterization Cost in Kansas City?
Professional sprinkler winterization with KC Sprinkler Pros starts at just $100 for systems with up to eight zones. Additional zones are $5 each.
For a lot of homeowners, that makes the decision pretty easy.
There’s no compressor to rent, no fittings to track down, no figuring out which valve does what, and no wondering afterward whether you actually got enough water out of the system.
You pick your appointment, and we’ll take it from there.
DIY or Call KC Sprinkler Pros—the Important Thing Is Getting It Done
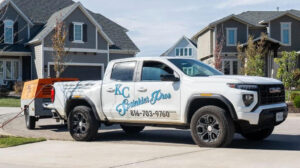 If you’re comfortable winterizing your own irrigation system, bookmark this guide and come back to it each fall. Properly winterizing your system is one of the best things you can do to help protect it through a Kansas City winter.
And if you made it through this guide and decided you’d rather let us handle it?
We get it.
Winterization with KC Sprinkler Pros starts at just $100 for up to eight zones, and we’ve made booking easy.
Simply book online, choose an available date and time that works for you, and we’ll take care of the rest.
Schedule your sprinkler winterization with KC Sprinkler Pros today and head into winter knowing your irrigation system is ready for the freeze.